| Linked
clones with ESXi without the help of a vCenter
As soon as you can create snapshots you have all the ingredients required
to create linked clones.
This will walk you through the process of creating a bunch of linked
clones from one master.
Only tools used are the vSphere client and a text editor on a Windows
host.
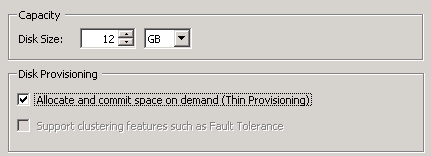
First create the master VM.
It is recommended to use a thin disk ...
Give it a reasonable name - so that it stands out from the other VMs.
In the example I called the VM "dont_touch"
Install the new VM and when done reboot it and install VMware-tools.
Feel free to add more apps ... or sysprep the master VM ...
Once you are satisfied power down the VM.
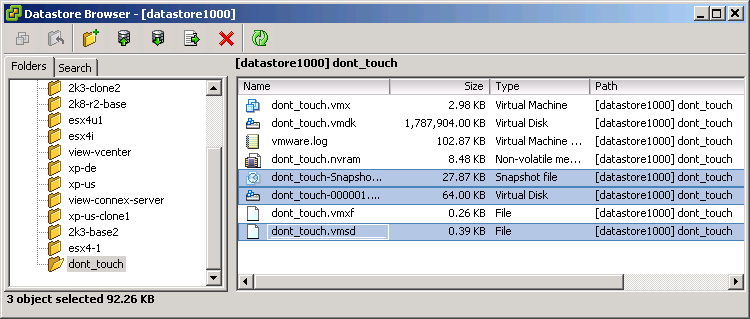
Now create a snapshot with the vClient.
See the screenshot - the files that belong to the snapshot are hilighted.
From now on regard the directory "dont_touch" as readonly.
Do not start the VM again.
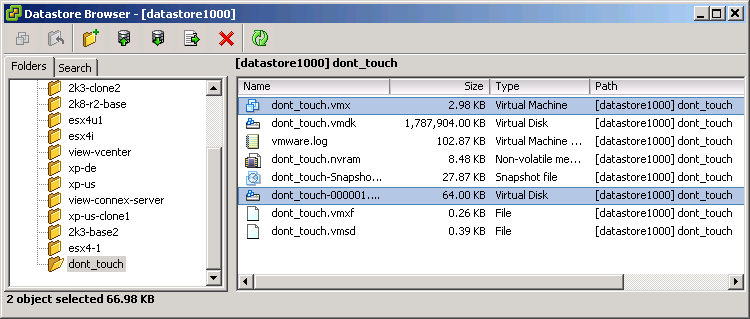
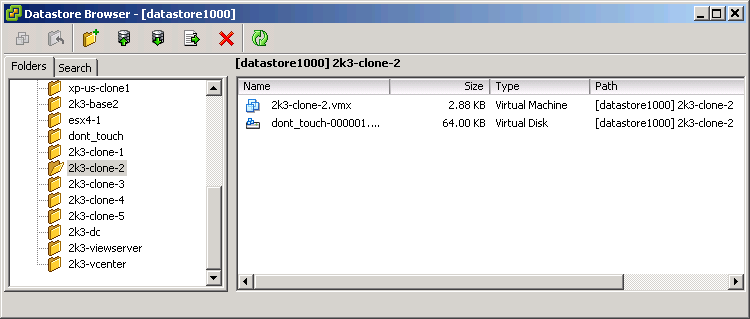
Next use the datastorebrowser and download the two files hilighted
in the next screen : the vmx and the snapshot-vmdk.
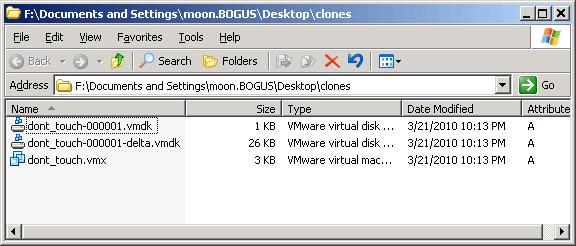
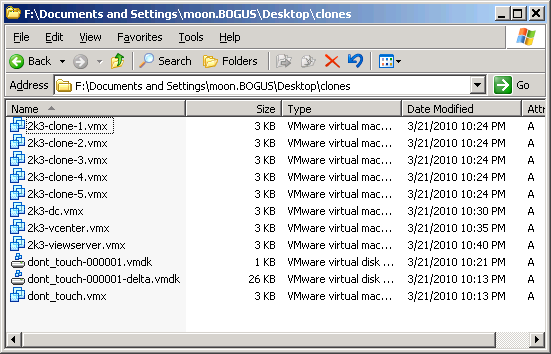
On your Windows-host the two downloaded files should now look like
this.
Don't worry - the datastorebrowser is a funny guy - he shows you two
files but downloads three.
And ... he thinks this is helpful ;-)
First thing to do is edit the "dont_touch-000001.vmdk"
It now looks like :
# Disk DescriptorFile
version=1
encoding="UTF-8"
CID=fa3d08b7
parentCID=fa3d08b7
createType="vmfsSparse"
parentFileNameHint="dont_touch.vmdk"
# Extent description
RW 25165824 VMFSSPARSE "dont_touch-000001-delta.vmdk"
# The Disk Data Base
#DDB
ddb.longContentID = "9b8da3d63cda1e5dbea7c0f4fa3d08b7"
As we want an absolute path for the parentFileNameHint parameter
we edit the vmdk-descriptor so that it looks like:
Note the yellow line ! It shows the edited path.
# Disk DescriptorFile
version=1
encoding="UTF-8"
CID=fa3d08b7
parentCID=fa3d08b7
createType="vmfsSparse"
parentFileNameHint="/vmfs/volumes/4ba3aca0-eca4fd60-312d-f4ce46af50b6/dont_touch/dont_touch.vmdk"
# Extent description
RW 25165824 VMFSSPARSE "dont_touch-000001-delta.vmdk"
# The Disk Data Base
#DDB
ddb.longContentID = "9b8da3d63cda1e5dbea7c0f4fa3d08b7"
Tip: to find out the absolut path look it up in the vmx-file - the
parameter sched.swap.derivedName
also uses the absolut path.
sched.swap.derivedName = "/vmfs/volumes/4ba3aca0-eca4fd60-312d-f4ce46af50b6/dont_touch/dont_touch-aafe8f9c.vswp"
The part marked in yellow shows the absolute path that is required
to adjust the vmdk-description.
Now is also a good time to delete that parameter from the vmx-file.
Don't forget that !
Now we can create several copies of the vmx-file.
Give every file a new name and adjust the display name parameter.
displayName = "2k3-clone-1"
Screenshot below shows several new copies of the vmx-file - each one
has the display-name adjusted and the
sched.swap.derivedName line removed.
Now back on the ESXi create several new directories for the clones.

Into each new directory copy the appropriate vmx-file plus the two
vmdks.
Again - don't worry - you need to upload three files but datastorebrowser
only displays two.
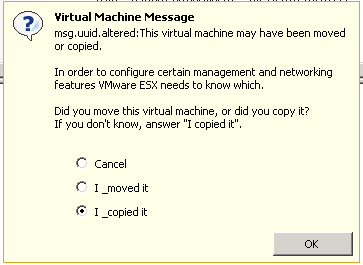
Now all is left to do is add the vmx-file to the inventory and make
sure you click "I copied it" on first launch.
During first boot of the cloned VM it is advisable to unconnect the
network-card.
On a Windows VM you may want to run newsid.exe, change the hostname
and configure the network on first boot.
Then reboot and enable the nics.
top
|
