
home
moa
vmx
vmdk-handbook
about
donate
forum
MOA 3 setup - using Debian 64 option only
by
Ulli Hankeln
In emergencies visit Sickbay ![]()
This Howto describes how to do a simplified setup of MOA 3 using only the
Debian 64 bit option.
If you want you can also add the other boot-options that use an ISO-file.
In this Howto the BartPE and ESX options are removed. You can not add them
later without reformatting the disk.
The instructions assume you have a fresh new USB-disk - if you have any
data on it now remove it. Don't complain later ...
Doing this on large USB-sticks may work but in my opinion is not worth it.
You want better performance then USB-sticks can deliver.
Best option is to use a SSD disk that is plugged into an enclosure that
can be connected via eSATA or USB
The first steps - the partitioning of the disk and making it bootable are
done on a Windows-host which has the USB-disk connected.
Questions ? - ask here
Partition the disk
1. partition : create as FAT 16 with max size 2Gb - must be a primary one
- set it be the active partition
2. partition : create a blank partition - will be later used for swap -
use a primary one
3. partition : create a blank partition filling the rest of the disk - use
a primary one
Populate boot-partition like this
download the moa3-boot-002.zip
file to the FAT-boot-partition

extract the zip-file

go to the src-directory and install grub4dos with this settings
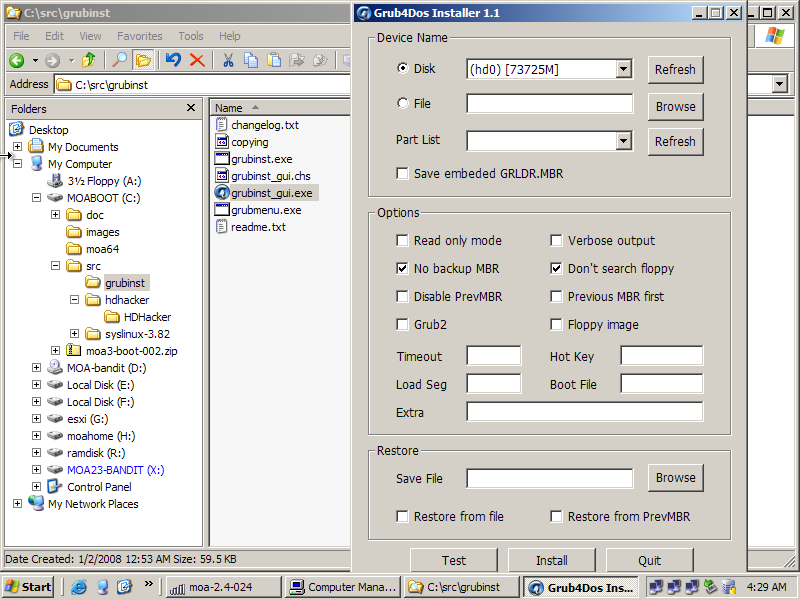
a cmd will popup - just hit enter.
also download moa3-live-rw.tar.gz
or later version and put it into the boot partition.
At this time the work that must be done on Windows is finished.
The next steps can be done on any 64bit host - or inside a VM where you
add the USB-disk as physical disk.
Populate live-rw-partition - populate the EXT3 Partition
Boot the USB-disk on a 64bit host - real metal or virtual machine - and select boot-option "MOA 64 core"
After full boot you must first set a temporary password for the root-account.
user@debian: $ sudo passwd
Enter new Unix password: toor
Retype new Unix password: toor
Become root
user@debian: $ su
Password: toor
Find out the correct devicename for the USB-disk - in this case it was
detected as /dev/sdb.
To do this you can use cfdisk.
debian:/home/user# cfdisk /dev/sdb
When you are sure you got the right disk format the third partition to
ext3 and label it as "live-rw"
debian:/home/user# mkfs.ext3 -L live-rw /dev/sdb3
Mount the FAT-partition
debian:/home/user# mkdir /mnt/boot
debian:/home/user# mount -t vfat /dev/sdb1 /mnt/boot
Mount the EXT3-partition
debian:/home/user# mkdir /mnt/live-rw
debian:/home/user# mount -t ext3 /dev/sdb3 /mnt/live-rw
Copy the tarball to the EXT3 partition
debian:/home/user# cp /mnt/boot/moa3-live-rw.tar.gz /mnt/live-rw/
Extract the tarball and reboot
debian:/home/user# cd /mnt/live-rw
debian:/home/user# tar zxf moa3-live-rw.tar.gz
On next boot the option "MOA 64" should work.
It automatically logs in as user "user" - to change to root use
su - password "sanbarrow"
Now you can run "startx"
I nstall Workstation 7.1 RC for Linux
boot into the boot-option MOA 64 - download latest Workstation bundle for
version 7.1 Linux 64.
Install it as root - password to change to root is "sanbarrow"
The setup can be started like this ./*.bundle and should proceed without
errors.
Optional install Converter 4.0.1 for Linux
boot into the boot-option MOA 64 - download latestLinux-tarball for version 4.0.1 Linux 64.Install it as root - password to change to root is "sanbarrow"
Enable swap
when everything is done launch gparted from the startmenu and format the second partition as linux-swap
You may want to adjust your menu.lst and remove non-functional options - see here for examples
<<<
© Ulli Hankeln 2010